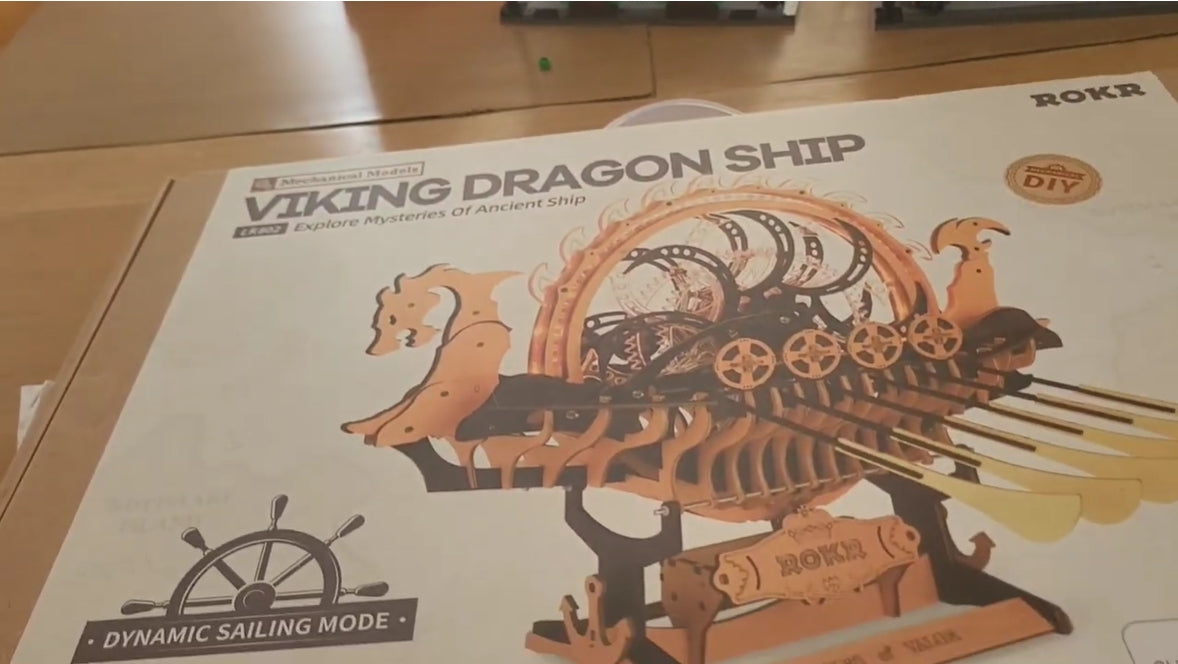
Editor's Note: This is a review post about the ROKR Viking Dragon Ship, originally posted by @buildingwiththeboys. We have compiled and summarized the contents mentioned in the video to objectively and impartially review this product for everyone.
The ROKR Viking Dragon Ship is another 3D wooden puzzle masterpiece that brings a detailed representation of Viking craftsmanship. It showcases a glimpse of the sailing journey and exploration, with the intricate appearance of a dragon ship and the decorations of a realistic oar. Get ready to build this mechanical model and embrace the challenge, enthusiasm, and fun of solving every part and corner of it. Let’s start with the warrior-like skills in puzzle solving and learn the details of this 3D puzzle!
Details:
- 299 Wooden Pieces
- Approximately 4 Hours of Assembly Time
- Difficulty Level: ★★★
- Assembled Size: 18.1*18.3*14.5" (46.5*46*36.7)
- With Assembly Materials and Tools
- With Comprehensive Guidelines and Instruction Manual
- Free Worldwide Shipping for Orders Over $65
- 100% Protection Against Shipping Mishaps
- 30-Days Risk Free Return Policy
- Free Replacement Service for Broken Parts
- Requires 1 Type-C Power Cable
Product Features:
- Advanced Mechanical Structure- The model is professionally crafted with state-of-the-art structure from the moving parts, wheel drives, exquisite dragon models, and connecting oars.
- Glitter and Colorful Effects- It stands out because of the dragon spine tower with the brilliant glitter effect.
- Black and Gold Moving Oars- There are a total of 12 oars from both sides of the ship structure, highlighted with black and gold painting for a more pleasing appearance.
- Defensive Round Shields - It has a defensive round shield flank, giving it a realistic approach to the Norse history of defensive oar ships.
- Detailed Dragon Head Design- This dragon head rotates and emphasizes the fearsome posture of conquerors in their sailing journey.
- Transparent Polystyrene Materials - Some materials are polystyrene, and their transparent color adds a more vibrant vibe.
Assembly Tips:
- Check the tool kits included, and if you need other types of snipping or cutting tools, you can get your own as long as they will be useful in the assembly process.
- It would be ideal to use wax on the moving parts to achieve polished and smooth movements once the model gets built completely.
- Study the parts very well and sort them out according to their particular structures.
Solving the ROKR Viking Dragon Ship
Another 3D model from ROKR has come to us, and to discover its details further, we are going to share some key factors when building it. It is already guaranteed that ROKR always assures that their models come with a challenge and uniqueness, plus they meet the expected amazing results.
Upon receiving the 3D wooden model of the Viking Dragon Ship, it came with a huge box with a handle, and it gave the idea of having hefty pieces inside. During the unboxing, a set of tool kits and high-quality wooden parts, along with the instruction and inventory book, were shown. Next to the manual are the functional screws, screwdrivers, and a realistic motor that will light up the ship.
Now, here are the detailed stages of solving the model:
Stage 1: The Dragon Spine

It starts with getting the transparent flywheel drives or the one that looks like a dragon spine and locks them together by slotting the pins. You can also see the black and orange piece with almost the same structure as the transparent one. Upon putting them together, you will consume about six screws out of the 17 pieces. Additionally, you should wax the gears first if you want to achieve a smooth motion.
Stage 2: The Dragon’s Head, Body, and Tail

The next part is the dragon’s head, body, and tail, which are connected to the whole model. Start with lay-outing the parts needed to form the head of the dragon, and lock them up using a screw lock of around 8 millimeters long. After finalizing the head, check out the piece with the B1 symbol, which is the neck part of the dragon, and connect it with the head. Next is the tail part, where the same process continues. All of these parts are popped with screws for durability and stability. Additionally, they come with orange and black contrast that displays gorgeousness.
Stage 3: The Body of the Ship

This is the longest piece from the kit, and the key part highlights the dragon figure even more, as it is located between the head and tail. You can check the H7 symbol as a guide, and take note that it comes with the spine image of the dragon.
Stage 4: The Sides and Lower Parts of the Ship

If you want to get your moving gears from achieving a smooth motion, waxing is the best option to help you out. The model kit comes with a motor that powers up the whole ship to move. And since the side and lower parts of the ship are the crucial part because of their movements, the largest screws are used to stabilize them.
There are numbers on the pieces where you can partner the ribs in by pushing them all the way down. Next, the wirings of the model are organized, and they are placed in the middle of the ribs. This is where the electric modes will happen. For better stability, there are two long connecting rods to use to connect the ribs you pushed down.
Additionally, it’s time to work closely on putting together the ninja-like thing and the transparent disc. The image of the disc may look pretty deadly, but they add some vibe. Then finally, it’s time to lock the two using the screws.
Stage 5: The Vessel and Moving Oars

The challenge starts with the complicated part of the moving oars and the vessel of the boat. They are seen on the sides of the ship, and the main advice is to wax the moving objects for smooth movements when powered on. This is where the tool kits will be functional; they will be used to make the parts stay firm and placed well.
Some shields are push-to-fit and will not give you much of a complication because of this mechanism. Put the fins-like parts in front and at the back of the ship. Also, the motor wiring comes with covers or lids that are part of the base of the ship. Lastly, make sure to hang the oars on the holes on both sides to see how it will move like a realistic ship.
FINAL THOUGHTS
Upon opening the box of the ROKR Viking Dragon Ship, it didn't seem very easy at first glance, but it was actually fun to build. You may feel the challenge when you see the intricate patterns and designs of the wooden pieces included in the kit, but it is guaranteed to give you an amazing experience. The tools kits started from the screws and screwdrivers and everything that helped in making the build stable and durable. It has a working motor that focuses on the movements and the lightning effects.
After solving the 3D wooden puzzle, you will realize that the assembled size is quite wide and big enough to be an ordinary home décor. It would be best to display it somewhere with a spacious location to highlight its beauty even more. And when it comes to its lighting and brilliance, the orange and black contrast makes it look fantastic and glorious. It is perfect during the nighttime, as the spines light up beautifully when in darkness – thanks to the USB-C ports that you can power it up through batteries or power banks. You may witness the oars moving slowly but attractively. The smooth movement can be backed up by waxing the gears, and you will surely benefit from how it can change the game.

And for that, the overall puzzle-solving journey for the ROKR Viking Dragon Ship is both a combination of a challenge and a lively, entertaining experience. It's time to challenge yourself again and big thanks to ROKR for bringing another amazing 3D wooden puzzle kit for everyone to try and build. Surely, you will not regret having this one!
Robotime is a creative lifestyle company dedicated to designing and developing 3D puzzles, toys, and wooden handicrafts. Subscribe to learn more.









1 comment
I’m trying to reduce the number of kits in my stash but now I have to get this as it does look great and it did look like an easy build. Will look good with my other Rokr kits
Sheldon Martin
Leave a comment
This site is protected by hCaptcha and the hCaptcha Privacy Policy and Terms of Service apply.