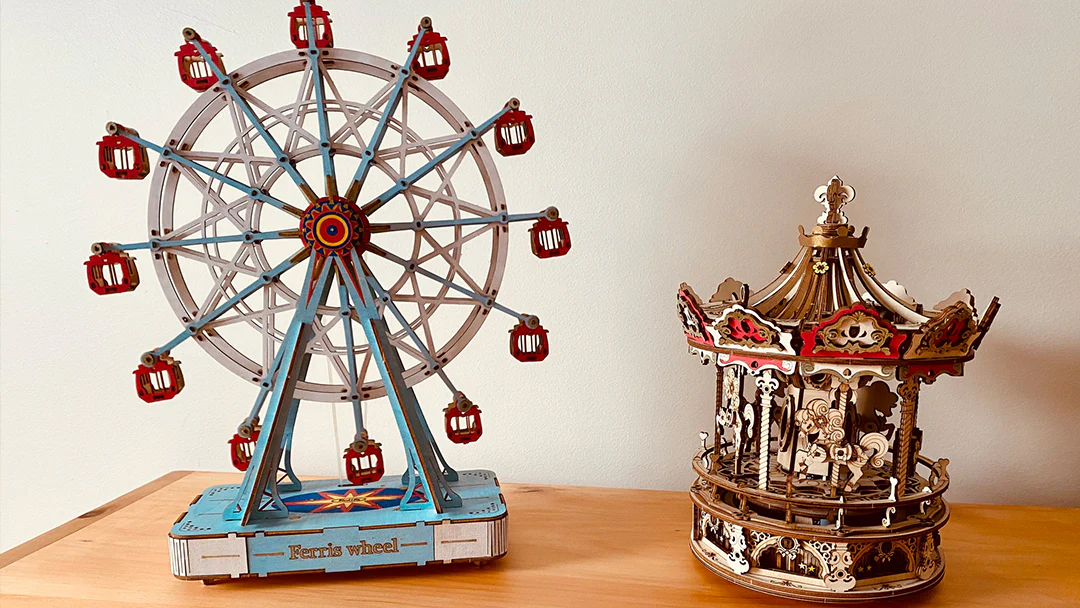
More and more people try to paint 3D wooden puzzles to make them more unique. However, painting will increase the difficulty of putting together 3D wooden puzzles. If you are trying it for the first time, it is necessary to do some homework to avoid some mistakes.
So, in this article, we have summarized some advice from painting experts who love ROKR models. Through it, you will learn preparations before painting and how to paint 3D wooden puzzles.
Tools Needed
- Paints: Acrylic Paint Set for Painting, markers, sharpies.
- Wax: Vaseline
- Glue: Wood glue/Super glue.
- Sand: 240 grit sandpaper

Some painting tips from our group's experts
Do you think about the color scheme before you start?
Neil Leckman says, "I spend hours considering a stain or color and envisioning the final product before I even touch it. I was trying to get the look of an old wooden toy. Unlike the computer you can't just erase a color you decided you don't like. If it's a dark color forget it. So think, dream, color, stain and alter it in wondrous ways to make it truly a one-of-a-kind creation you did. Remember above all it is about the joy of the build!"
Do you paint before or after assembly?
"If you can visualize the assembly well enough, paint before assembly. I occasionally slightly ‘unassemble’ a bit just so my pen won’t touch the wrong area and then push the part home. Best of luck and have fun whatever !!" said Anne Graham.
"I've built many, but the pinball machine I spent time on and wanted to paint it. First, I stained all the wood, front and back. Then, I painted as I went, or, more specifically, when I learned what each part was for and if it would be visible." Zann Tabball.
"Painting, I use Acrylic paints. I paint as I go," said Rick Thompson.
Do you avoid painting the tabs so as not to affect how well they fit?
"Just know that pieces will swell no matter what you use. You also have to sand connections after painting so they fit properly.", Morgan Guffey said.
"I try and avoid the tabs and don't bother with parts that are very evidently never going to be seen.", said Paul Walker.
Are there any types of paint you would avoid?
"I started adding the fluorescent overcoat with enamel, but I found it wasn't quite getting the effect I wanted, so I switched to acrylic fluorescents. Patience is key. Some tabs I painted, some I did not. It became important when I was assembling fragile pieces. If I had painted the tabs, it added the risk of the piece breaking during assembly. I initially wanted to paint with enamel, but the volume of paint needed and the difficulty of working with enamel turned me away from it. Acrylic is much easier to recover mistakes than enamel. Except for the fluorescent paints - mistakes with those are permanent as the fluorescent seeps in the wood and then is visible under UV light." said Zann Tabball.
Do you wax after painting?
"To avoid breaking parts, turn the sheet over and cut the tiny spots left from the laser cut. If pieces are really tight fitting together use door ease or wax to help them snap together easier. I try to paint before assembly and I use alcohol-based makers. Alcohol markers are more like stains and don't build up on the tabs. If I have to use actual paint for instance, metallic or glitter paints, I avoid painting the tabs or slots until after assembly if possible. I lube any part that will be moving whether the instructions call for it or not." said Ralph Ravenscroft.
Dealing with Paint Bleeding
Before it is time to use acrylic paints, too much moisture can cause problems with color bleeding. To avoid this problem, you can try using a sealant first and then paint with acrylic paint and brush, then sealant/clear spray paint as a top coat.
Layering and Blending
"I used acrylic and learned to water down the paint a bit and use multiple layers. The wood absorbs the water, so if you want good coverage, multiple light layers are best. For detail, I got some quality detail brushes that could hold a single drop of paint and pull it along lines." said Zann Tabball.
For the very thin lines, you need a very small brush. What kinds do you have?
"For some of the small curves bit, I poured out the paint and used the Mont Marte brushes to paint those small gaps or edges that I could not reach with the marker tip. this brand is pretty affordable and it has perfect quality brushes with soft and high-density hair, so it will leave a smooth finish without that uneven line. But at the end of the day, I think everyone has their own preferences, so my advice is just to test out a few different kinds of paint or brand, just to see comparisons of the results, and from there, pick your own preferences." said Tracy Ta.
Last thought
After learning these tips, you must have a new understanding of how to paint 3D wooden puzzles. Of course, you can also join our ROKR group for more painting-related help. Also, you can check out our coloring 3D Wooden puzzles page for more information.


Leave a comment
This site is protected by hCaptcha and the hCaptcha Privacy Policy and Terms of Service apply.