Editor's Note: This is a review post about the Sakura Densya Book Nook, originally posted by @buildingwiththeboys on YouTube. We have compiled and summarized the contents mentioned in the video to objectively and impartially review this product for everyone.
Description
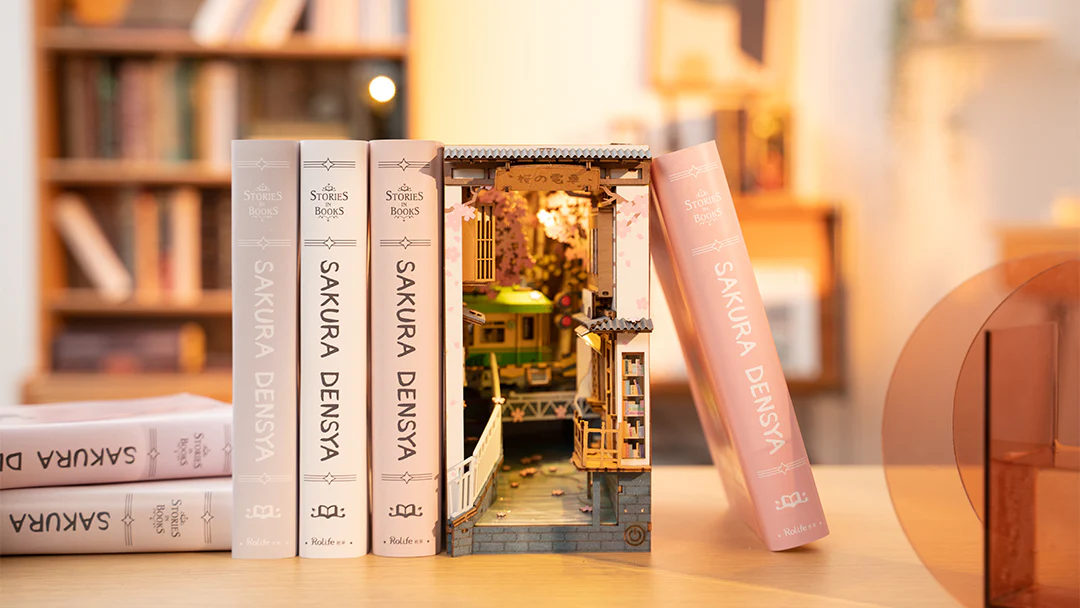
The Sakura Densya Book Nook Shelf Insert depicts a romantic scene of the streets of springtime Tokyo. As the delicate cherry blossom flowers fall, the train awaits to carry you into a wonderland that will tickle your imagination.
Details
- 340 pieces
- About 6 hours of assembly time
- Difficulty level: ★★★★
- Assembled size: 180*110*240mm
- Package size: 230*310*46mm
- Weight: 840g
- Package included: Precutting wooden pieces, English instruction, Warm light strings, Auxiliary tools ( screwdriver and small parts)
- Main materials: Wood, Paper, Metal
- Free parts replacement service
Features
- Most parts come pre-painted, though some are left for you to give your artistic touch.
- Equipped with two battery-operated warm lights for a cozy atmosphere. Batteries are not included.
- Uses different materials like corrugated paper, cardboard, wood board, and translucent PE sheet paper for a vivid and layered effect.
- Easy to follow detailed instruction manual in English with pictures.
Assembly Tips
- Test the bulbs before installing them. To do this, remove the protective covering off the ends of the light and connect one on each side of a button cell battery. You can use your fingers to keep them firmly in place. If it doesn’t light up, try switching up the wire ends. If it still doesn’t light up, then you have a defective light bulb.
- If you have difficulty inserting the wooden tabs, try rubbing candle wax on them first.
How To Assemble the Sakura Densya Book Nook
Starting with the Small Parts
It had the easiest start to a book nook kit from Rolife that I’ve tried. The crossing and cherry blossom trees were just a matter of attaching the decals. Meanwhile, the AC unit was a simple box construction and the signage can be pushed to fit. For the windows, make sure that you have two pairs with one right and one left each.
Putting Together the Train
A lot of people have trouble assembling the cover of the train but I found that the key is to gently coax the tabs into the holes. Don’t force them in because they might break. You can try rubbing some candle wax to make them slide in smoothly. Once you’ve inserted the tabs on one side, lock the tab in the middle and move on to the other side.
Use the same gentle force when attaching the train roof. Just get the two tabs on one side first before doing the others.
Assemble the train tracks as instructed and add the small details. Next, attach the train to the track as well as the crossing and one of the cherry blossom trees that we assembled earlier. The tabs are a snug fit so again, the key is to go slowly and gently.
Working on the Base
First, put together the battery box with the switch facing outwards. Then, pop the G13 piece in the base’s corner before attaching the battery box that you’ve made. I wouldn’t advise gluing the battery box to the base, so you can take it out if there’s anything wrong with your electrics. Also, be careful not to pinch or pull the wires.
Attach the water element on top of the base. I really like how it’s made of something like vinyl to give it depth and texture. The sidewalls and stairs go on next.
Thread the wires up the slot. Then, arrange them as shown in the video, pinning them in place using the provided tabs.
Building the Sidewall
This part isn’t complicated at all. Just attach the parts we made earlier - the blossoms, windows, and AC unit along with the corrugated rooftop. Screw in the three brackets which, unlike the other kits, go internally.
Once that’s done, just attach the sidewall and train section to the base. Screw the touch panel to the back in the orientation that I’ve shown in the video. Then, attach this to the base.
Fixing and Testing the Wiring
Now, this is the hard part where a lot of people get stuck. Just follow the manual and thread the wires and secure them with the provided tabs.
Take the black wire from the top light and remove the safety end. Do the same for the other black light wire which is up onto the side. Twist these wires together to combine them into one wire.
Then, take the black wire from the battery box and remove the cover. Merge this wire with the newly adjoined wire by twisting again. Use a piece of tape to hold the wires together. So, that’s three wires joined together into one wire.
Do the same thing for the red wires. Put batteries in the battery box. Press the button and hope the lights turn on. The switch is reactive which is a good thing. If the lights are working, you can now put the sides on and put a sealant on them.
Finishing Up
With the rear view of the book nook facing you, remove the film protecting the mirror and slide it in behind the train. This will add depth to the book nook, making it look even more amazing. Attach the back panel.
Next, plastic ceiling pieces and take the film off. Use the cherry blossoms as a guide to know which way it is supposed to go. The large flower is supposed to go at the back. Insert the front tab and place the other tabs on the sides.
Grab the top piece and slide it into place while keeping the wires down. Once the tabs are lined up, pop them down all around.
And there you have it. Congratulations on making it all the way to the end. Now, all that’s left to do is turn on the lights and admire the Sakura Densya Book Nook that you made.
Conclusion
Assembling the Sakura Densya is straightforward compared to the other Rolife book nook kits that I’ve tried. The colors are beautiful and I love how the mirror gives it so much depth. The mirror makes it look like it has more cherry blossoms than it actually has. What’s more, the ripple effect looks gorgeous, especially with the lights on.
The massive advantage of the Sakura Densya is the wiring. All the wires are on one side, making it easier to assemble. There are really no cons to this book nook that I can think of since it’s been a dream to build.
Overall, this is going to rate highly in my collection. There’s so much going on. There are a lot of details that you can explore. It’s a very solid book nook that’s quite easy to assemble.
FAQs:
Q: Does Sakura Densya come with glue?
A: No, the Sakura Dessya box does not include glue. As you can see in the assembly construction and Robotime shipping policy, due to international shipping, customs regulations do not allow packaging to contain glue, paint, and other prohibited items.


Dejar un comentario
Este sitio está protegido por hCaptcha y se aplican la Política de privacidad de hCaptcha y los Términos del servicio.